Sunday, March 8, 2009

Button with a scroll box

Check this out! I finally have my own button! Please copy code and add to your blog if you'd like!
I found a short and easy tutorial on how to create your button with a scroll box.

Button with a scroll box tutorial


Thursday, March 5, 2009

Canvas Picture Frame Art

Thanks to Chrissy, I created this beautiful canvas picture frame. I love the way it turned out. I had to display one of my best wedding pictures. It was taken towards the end of our day. We each had huge sparklers and our photographer had the greatest idea. We had to try to make a heart with the sparklers. It was a little hard since my husband is really tall. His side was always too high. Our photographer caught this picture and its great! I love that the picture is black & white and a little blurry. Tawnya is the best photographer ever!

Canvas picture frame art now in my etsy shop!

So Lovely Creations


Shabby Block and a prayer

So, what do you think? Ive seen some of these initial blocks on etsy, but I never found a block I had in mind. So I decided to make one myself. It takes a while because I cut the wood, sand, prime, paint, decoupage, let it dry in between coats and paint again. Plus I have to finish with a coat of varnish for the final touch. I think it turned out great though! All that time was worth it! I am thinking this could be great to give as gifts! They really look wonderful! I love the wrinkly look! I post this block on etsy, hopefully I could sell some.

One little thing before I finish this post. Just wanted to ask for your prayers. I haven't worked as much as I would like to. Work is a little slow. I just received an email saying they are lowering our pay due to economic crisis! Its not much, but does make a difference. I still have no insurance. I love my job, but I am working less and less. I only worked 2 days this week :( where normally I worked all 5 days. Please, if you can, please pray for me that my job gets a little better. It makes me so sad watching the news of families who lost their homes, their jobs, people who are committing suicide because they cant keep up. Its hard. Its emotional. We have to be strong, and pray that everything will be all right. I pray every day that everything will get better.

God listened to my prayers last week! I was praying to sell some of the things I do to cover at least one of the days I didn't work and I had 6 orders! Wow! That was great! God is so good! Hopefully I could sell some more stuff!

Thank you girls! I really appreciate your nice comments! They make my day! :)

Have a great day!


Wednesday, March 4, 2009

Milk Glass

Love it or hate it? I personally love it! I bought these beautiful pieces at an antique store today. I didn't know milk glass could be so expensive! I have my eye on a beautiful milk glass bowl but its $110! Thats a little too much for me. I don't get paid that much too afford a $110 bowl. :) But its beautiful and I want it! Hopefully they could put it on sale soon! Cross fingers!


I wasn't sure if I wanted to buy these. All of our decoration in our home have normally dark colors. I didn't know if they would go well together. White does go with everything, doesn't it? Well I tried dressing up my entry way table with the milk glass decorations and it looks funny. Maybe because I am not use to having white decorations in my home. Spring is just around the corner and I want it to have a "spring-e" feel ( I know, made up word). Fall is over and so is winter! I want to incorporate more lighter colors this spring. So, what do you think about the new "spring-e" look? I am thinking of buying a antique white lamp and replace it with the darker one. Does it look ok? To tell you the truth, I like how it looks in person, but when I saw the pictures I did not like them at all. Should I replace all of the darker decorations in the table with lighter ones? Should I just keep the old decorations? I never thought it would be so hard to dress up an entry table! Leave comments, be honest I wont get upset promise! All comments appreciated! Also, if you own milk glass decoration, I would love to see how you use them to decorate in your home!
Thanks!


BEFORE


AFTER


Hayden's Home


Meet the Hayden's :)

Katie was my mentor teacher during student teaching (1st grade). She is an awesome teacher and I learned so much the semester I was in her classroom. She is a very kind, sweet, fun person and I am grateful I met her.

I want to share with you some pictures of their home. I love their home! They have a great way of decorating. The colors are great, decorations are beautiful everything just looks perfect. I really like the open floor plan. I wish I had that in my house. In our home, there is a wall that divides the kitchen from the living room. Future plans are, bringing down that wall or even buy a new house! Who knows! Another thing I love about their kitchen is the granite countertops. They look beautiful! So, what do you think? Enjoy!


Tuesday, March 3, 2009

I've been busy...


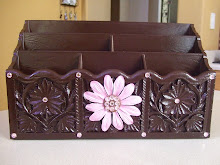
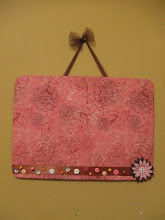
Making these cute custom wooden peg hangers......


This cute hair bow holder...


and this cute frame! I am currently working on two more projects. These items have been created and shipped. I still need to finish and ship two more custom orders! :)

Monday, March 2, 2009

Good News

First, I have received 3 awards! :) This makes me so happy!

Second, I have joined the gym! :)


I really enjoy all the comments you write! Thank you so much! Everyone has been really sweet and kind! It makes me want to blog more!

I received this Kreativ Blogger award from TBerri @ The Four Frugal Scarbarys. Thank you so much!


Here are the award rules:
List 7 things that you love and then pass the award to 7 bloggers. Be sure to tag them and let them know they have won. You can copy the picture of the award and put it on your sideboard letting the whole world know- you are KREATIV!


7 things I love:
  1. I love Jesus
  2. Husband
  3. Family
  4. Traveling
  5. Being Crafty
  6. Blogging
  7. My Job
7 of my favorite blogs I'd like to pass this award on to:
  1. Living Life Patino Style
  2. The Maisy Report
  3. The Nesting Place
  4. 320 Sycamore
  5. Be different act normal
  6. Little April Big World
  7. Miss(es) Canadian Pie
Thanks!


I received this award from Steph @ Southern Fairy Designs. Thanks!


Now I have to pass it on to 10 people who do inspiring projects/work and generally make me smile and laugh.... so in no particular order at all...
  1. Cottage Style
  2. Katie
  3. Oh So Fabulous
  4. Rachel
  5. Dawn
  6. Kim
  7. Trina
  8. Shay
  9. Chrissy
  10. Lyndsie

This last award I received from Shay @ Everyday Moments. Thanks!


The friendship award rules.
These blogs are exceedingly charming. These kind bloggers aim to find friends and be friends. They are not interested in self-aggrandizement. Our hope is that when the ribbons of these prizes are cut, even more friendships will be propagated. Please give more attention to these writers. Deliver this award to five bloggers who must choose eight more and include this cleverly- written text into the body of their award.

  1. Kimberly
  2. Peace Love Applesauce
  3. Stacey
  4. Krista
  5. Kelly
Thanks to all of your comments and kind words! :) Much appreciated

Sunday, March 1, 2009

Hair Bow Holder Giveaway

This was a custom order I made yesterday. I loved it so much I am giving one away today! I love giveaways so I am having one today!

All you have to do is:
leave a comment telling me, what two colors you would choose if you won this item

and

link :)

A winner will be chosen March 16th!
Good Luck
Thanks!

So Lovely Creations

Saturday, February 28, 2009

Blue Marshmallow Lollipops

I saw this cute idea @ Living Life Patino Style and I loved it! I have been wanting to try it for a while, but I waited for the perfect occasion. We are having a bridal shower today for my cousin Diana. Her wedding colors are turquoise and white. Marshmallow lollipops are perfect to decorate any table at a party. The ones I did today, could also be perfect as baby shower favors (girl -pink- boy - blue-) even birthday parties! No matter what, they look wonderful and taste wonderful too! I dare you to try them! :)
I only spent around $10 for everything! Not bad!

Marshmallow Lollipops

Ingredients

  • marshmallows
  • clear treat bags
  • lollipop sticks
  • chocolate wafers (many colors to choose from)
  • sprinkles
  • mugs ( to place marshmallow lollipops)
  • plates
  • fork
  • scissors
  • ribbon

1. Place a stick in each marshmallow. At first I used this valentine tin to hold my marshmallow lollipops, but found out large mugs work better.


2. Put chocolate wafers in a bowl. Put plate in microwave for 30 seconds. After 30 seconds mix the chocolate. You might need to put 30 seconds more and mix.
3. Dip the marshmallow in the chocolate and spin. Make sure you don't do it too fast! I got a little excited at first and I made a mess! :)


4. Go crazy and sprinkle the marshmallow lollipop.


5. When you have enough in your mug, place them in the freezer for 3 minutes or until chocolate hardens.


I just couldn't wait and had to have one! They are delicious!


Make sure they don't touch each other when you place them in the freezer! This could happen to you! These are called, "Stuck on You" marshmallow lollipops! hahahaha.. Actually, if you are having twins, this could be the best baby shower favor! hahaha..


6. Place the lollipops in a clear bag and tie with a ribbon. You can make them a little fancier by adding a tag, curly ribbon, cute embellishment etc..


There you have it! So simple, inexpensive and cute! Here is my bouquet of marshmallow lollipops! I hope everyone enjoys them as much as I did making them! If you try this project, please let me know!

Have a great day!


P.S.
Warning! You might end up with sprinkles all over your counter, chocolate everywhere (if you spin too fast) and this in your sink!
I'm kidding, its really not that messy!

Friday, February 27, 2009

Custom Orders


My picture!

I was looking at my photographers website, and guess what I see!? My picture in the front page!

Beauty of Life Photography

Go check it out!

Thursday, February 26, 2009

SR Creations Giveaway


My friend makes the most beautiful jewelry and very affordable.

SR Creations is giving away these beautiful pair of swarovski earrings.

There are three ways to enter and win these beautiful earrings.

For one entry, leave your first and last name in a comment.

For a second entry, visit SR CREATIONS website here. Look at the necklaces. Come back, leave another comment with your first and last name + your favorite necklace.

For a third entry, visit SR CREATIONS website here. Look at the earrings. Come back, leave another comment with your first and last name + your favorite earrings.

There should be 3 different comments!
I love her work!
You can also email for custom orders!

Deadline: March 10, 2009

If you don't have a blog, please leave your email.

Good luck to everyone who enters!
Please let all your friends know!
If you can, please link!
Thank you!


Velvet black stunning earrings
Collection: Swarovski Crystal

Jet black 6mm crystals with crystal rondelles make this a stunning piece to wear.

I love boxes!

I love boxes! I love small boxes, big boxes, weird boxes, decoupage boxes, pretty boxes you name it I love them! I am almost done with my craft room but I needed 2 boxes to store my clear stamps and glue. I went to the scrapbook store and saw some really cute pink boxes. When I looked at the price tag, wow! They were 19.99 each. Which is not bad cause they were really cute. I just couldn't afford $40 for 2 boxes at the moment! Plus my husband would have freaked out! :)
I immediately thought, "I could make the boxes myself". I stopped at Walmart and went straight to the aisle where they sell envelopes, tape etc... I found 2 small cardboard boxes that were .88 each! Now you know where I am going with this! I came straight home and started with my project! It was so easy, inexpensive and turned out so cute! I dare you to make one! :)

Cute Storage Box

Materials needed:

1 cardboard box
glue gun
scrapbook paper
embellishment
mod podge
spray paint
stamp pad

1. I used my glue gun to glue together the bottom part of my box. I used a little bit of tape first to hold together.
2. Glue all 4 flaps from the top of the box to the inside.


3. Spray paint your box. Light coats are better.


4. I cut a smaller piece of paper and decoupaged it to the front of the box. You will have wrinkles on your paper but this is good. You will see why!


5. The wrinkles came in handy! Using your stamp pad, rub against the paper and the sides of the box. You cant really tell in this picture but the left box is the one I distressed using the pad.


6. Be creative with the embellishment! I wanted a simple look with a flower, button and stickers! You can use ribbon, id plates, glitter, buttons etc...


Here you have it! My 2 beautiful inexpensive boxes! They look lovely in my craft room!
You can make them to decorate your living room, babys room, kitchen and even classroom!
If you ever make one, please let me know! I would love to see pictures!