

This project turned out so cute! I absolutely love it! I used mostly primary colors since those are the colors we have in our playroom/craft room. This artwork holder can be made any style to fit your theme/colors.
As you know, I am a stay home mom of 3 boys. It takes a lot of work to keep them entertained during the day without them watching to much television or using phones/tablets. Especially my 3 year old who is extremely full of energy. We do many craft projects and activities through out the day. I wanted to create a project to display their art in their playroom. I came up with this super easy and inexpensive idea using a frame from the dollar store. Im not going to lie, Ive had this frame for over a year! Its been sitting in my craft closet all this time. Im glad I finally found something to do with it. Hope you like it!
Materials:
* Frame
* Paint
* Paintbrush
*Glue gun
* Clothespins
* Decorative Wooden Pieces
* Gluestick (not pictured)
* Photos (not pictured)

1. Take frame apart and paint frame in any color you'd like. I used orange so it can stand out on the wall. I also used gloss paint for a shiny finish.

2. Print photos using any office program on your computer. The frame I used had 3 5 X 7 openings for pictures. I decided to print photos in black and white since I was using a lot of color in other areas.For the names, I typed them using an office program and glued them to the mat using a glue stick.

3. I glued pictures down on paper and put the frame together.

4. I purchased 3 decorative wooden pieces at a craft store. Using a glue gun, glue clothespin to each wooden piece. Let dry.
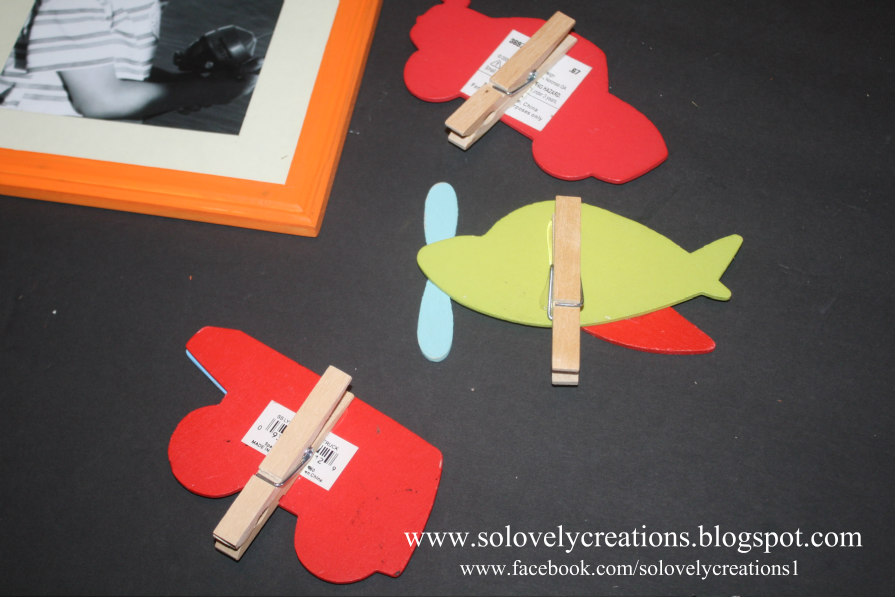
5. Once it dries, adhere each piece to the front of the frame. I glued outside pieces at the very end so their artwork wouldn't overlap.
Here is the final picture of artwork holder with their work! I havent decided yet where I will be placing in their playroom. I hope you have enjoyed this super easy tutorial!


No comments:
Post a Comment