Hello! Im back!
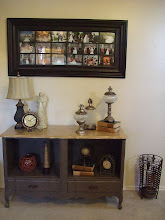
I've been dying to share this super, cute and inexpensive project! My husband created shelves in my kitchen. We had originally thought of making it a computer desk, but didn't like the idea at the end. I decided to add shelves in that area. We are still not completely finished with the shelves, but hopefully within the next 3 weeks.
I went to several stores looking for cute, distressed baskets but was surprised at how expensive they were. The least expensive wooden baskets were 26.99 for the style that I wanted and still seemed to small. I needed 8 boxes that were at least 12 inches tall. That was way too much for me at the moment for baskets.
I went to Home Depot and walked around for about 20 minutes. I then came across a section where they had Cedar Shims. I had never heard of Cedar Shims, but were the perfect material and size to create the boxes.
These boxes are turned out so cute and can be created in so many different ways.
Here is the tutorial on how to create them.
Materials:
- Cardboard Box
- Cedar Shims
- Glue Gun
- Scissors
- Pencil
- Clear Tape ( not pictured)
- Paint (not pictured)
- Paintbrush ( not pictured)
- Assemble the box and tape. I hot glued the flaps on the inside of box. I used a box that was 12 in X 12 in X 10.50 in.
2. If you see on the picture above, cedar shims have one end that is thicker ,approximately 1/4 inch and gets thinner to 1/8 inch on the other end.
3. Place the cedar shim on top of box and measure.
4. After placing cedar shim on box, use a pencil to mark the end of box. This is where you will be cutting the cedar shim.
5. Using a pair of scissors, cut the cedar shim straight where the mark is at.
6. After cutting cedar shim, add glue using hot glue gun and adhere to box. Make sure to hold wood down for a few seconds until glue dries.
7. I only added cedar shims to the front and back of boxes since you cant really see the sides of them in my shelves. I will be creating more for my bedroom where all 4 sides will be covered in wood.
8. Using a foam brush, paint cedar shims. I used a white wash then used a dry brush technique to distress them with brown.
Isn't that super easy and cute! I absolutely love how they turned out! I ended up making cute chalkboard signs and adding them to the front.
I hope you have enjoyed this post! If you decide to try them, I would love to see your creations! You can email pictures and I can share your projects! See you soon!


