Sunday, January 18, 2009

Ribbon Organizer

Remember these items I bought at a yard sale?


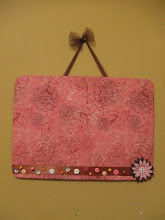
Look what I turned it in to! Tadaaaaaaaaaa... A beautiful, funky cool looking organizer! I love how it turned out! :) Very happy with the result! Again as you know, I am in the process of decorating my craft room and the items I am creating are going to look wonderful in the room! Pictures of the final room coming soon!


This organizer I created can be used as a necklace or bracelet organizer, key holder, back pack or purse holder but I am going to use it as a ribbon organizer! Thats right, might sound kind of funny but it will work perfect! I will use ring binders to hang ribbon, and they will be color coordinated. I don't have any ring binders , so once I buy them I will post pictures! I love the color combination! I used some of my scrapbook paper I had. I use scrapbook paper for most of my crafts!
So what do you think? Have you created a ribbon organizer? Please post your ideas of how you organize your ribbon!


I will show you how easy it is to create this cute organizer!

1. Sand the sides of the wood.
2. Paint the sides using any color you like.
3. Measure and cute patterned scrapbook paper.


4. I like to use spray adhesive, but you can also use Mod Podge. Glue pieces of paper to wood.

5. Glue ribbon around the edge.
6. Play around moving the knobs around to see where you want to place them.

7. Mark where you want to drill the holes.
8. Using a drill, drill the holes in the wood. (My husband helped me with this part) :)

9. Add a saw tooth hook to the back and display!
Enjoy!
If you ever make an organizer just like this one, I would love to see it! Leave a comment and a link to your project!

You have a beautiful unique organizer!


Please share your ideas of how you organize your ribbon! Please leave your name and website url. Thanks!


Bright Magenta Frame


Saturday, January 17, 2009

New in my shop!

I created this really cute box today! It turned out beautiful!

I am in the process of finishing decorating and organizing my craft room and these wooden boxes would look cute in my desk! I can use them to store pencils, paper, paintbrushes, buttons, gluesticks, hole puncher and more!

Listed in my shop!


The big reveal....

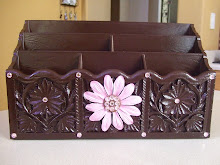
Remember this item!?


Look at it now!!!! Tadaaaaaaaaaaaaaaaaaa..... isn't it lovely? I love the color combination pink and brown!

I first cleaned the item.
Let it dry.
Spray painted "Espresso".
Let it dry.
Added a beautiful Bazzill paper flower and pink jewels, and this is how it turned out.

It will look great in my craft room!


This is before I added embellishment:


After adding the embellishment:


With Love,

How will they turn out?

I just came back from several yard sales they had in our neighborhood and this is what I found. Sometimes you buy things, and you really don't have a clue what to do with them. Other times, as soon as you see something, you know what you are doing!

I knew exactly what I was going to do with these items! They are not in the best shape, but with a little make over they will turn out great! :) I am all ready working on these great finds. Come back soon for "after" pictures!


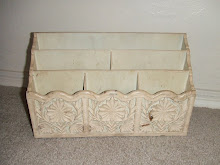
I found this at the goodwill store for $2.


This is supposed to be a desk name holder, but not no more! Got it for 25 cents!


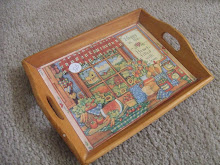
This is a really cute wooden tray, but it needs a huge makeover. Its old, and not the best pattern for my craft room. I have the perfect idea for this! Paid only 25 cents for this! I love yard sales!


Now this is the project I am really excited about. I got all 10 stainless knobs for only 1.00 at a yard sale and the wood for 50 cents. Cant wait for you to see this transformation! Can you guess what I am going to make?


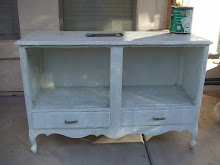
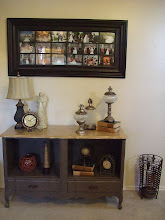
As soon as I saw this piece I had to have it. It was only 1.00. It's old, dirty, not in the best shape but has the most beautiful details. Its made out of wood and its heavy. I just washed it and I am ready to give it a face lift! :)


Now, this little hanger is just so cute! I found it at the goodwill for $2. I really have no clue what this is for. I have the perfect idea what its going to be! A ribbon organizer! It just needs some paint, embellishments, and the ribbon! Posting pictures soon!


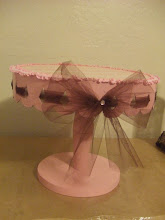
I love this piece! Doesn't it look like its metal! Guess what? Its not! Its plastic. At first when I saw it, it seemed it was going to be really heavy. So I tightened my muscles to pick it up, man, that thing almost flew out of my hands because its so light!
I love it!

These frames are not the best frames ever, but they will be pretty soon! They are made out of plastic and are very lightweight. I bought these for $1 a piece.
They have the prettiest detail!


So Im working on a few projects right now, come back soon to check what I did with these great finds!

Thursday, January 15, 2009

I am in love....

with this Valentine's banner I created today! Isn't it lovely? I have it in my craft room and it looks awesome! I took a trip to the scrapbook store after work today. I went with the idea to buy something to make a Valentine's craft, but had no clue what to make. Once I was there, I decided it would be nice to make a banner. They had the perfect die cuts and created this "LOVE" banner. If you have created any kind of banner, and would love to share, leave a comment so we can check them out!


Tuesday, January 13, 2009

Craft Recipes

So this is a new website I just found out about last night. It is pretty cool. Its a place where you can talk, share ideas, promote your etsy shop, show your crafts, for sharing recipes and much more! You should check it out!

Craft Recipes

They featured my shop for this week. See it here!

My featured Shop

My username is solovelycreations! Add me!


Friday, January 9, 2009

Tutu Wall Letters

Oh my... I've tried going to Hobby Lobby and not buy one thing, but guess what I cant!!! Even if they paid me to go to the store and not buy anything, I wouldn't be able to do it! I love that store! One of my favorite stores. They just opened one less than a mile from my house. Im there almost every day! Even employees know me! :] I dont know if that is good or bad!

Anyways, I went today and bought these large wooden letters. They are not that thick but look perfect on the wall! They are 9.5 inches tall. I bought different kinds of brown and pink patterned paper and decoupaged the each letter. I finally added tulle as embellishment and also to hang on the wall. I love how they turned out! I will put them up tomorrow, and hopefully my niece will like them! Like Im going to know if she does, she is only 4 months! Ive added them to my shop!


Stand Ups A-Z Wooden Letters

This is the new stand-up letter I created. I think it turned out great! I love the color combination! I plan to sell many more, and different colors! Perfect for baby's room, to give to a teacher as a gift, for living room, office etc.. I have tons of patterned paper to choose from if you like other colors! Let me know!

New in my shop!

SoLovelyCreations


Wednesday, January 7, 2009

So Glittery Boutique Wall Letters

This is my newest Boutique Wall Letters creation. I named this style "So Glittery" because, they have tons of glitter and they are sparkly! I love glitter! Pictures are not the best, but guarantee you will love them!
What do you think?


Boutique Door Hanger, Wall Plaque or Wall Letters

These turned out so adorable! They are custom door hangers or wall plaques! These are also perfect to use them as WALL LETTERS to spell out your child's name! This plaque is decorated with a beautiful paper, glitter, pink jewels and a tulle bow! Can be made in different colors, just ask! These are so glittery and beautiful! I made this one to hang in my craft room, and it looks great! This will be the first thing people will see in the room! New in my shop! Pictures are not the best, but guarantee you will love them!

SoLovelyCreations


The winner is........

Drum roll please.........................................

The Winner Is:

Sandy Kientzler

CONGRATULATIONS!!!

Come back and check my blog for future giveaways!