Showing posts with label organization. Show all posts

Sunday, March 15, 2009

Fun jewelry organizer

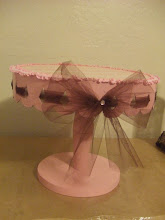
I love love jewelry! I wont go one day without wearing a piece of jewelry. If its a pair of earrings, a necklace or bracelets! I was cleaning my bathroom earlier today and I didn't like how my towel holder looked. Why you ask? Because, as you can see, I am using it as a jewelry holder. Towel holders are not jewelry holders! They work great as a jewelry holder but I don't like how it looks. I decided to make my own jewelry holder, a fun wild diva jewelry holder.


I have never owned a piece of zebra print clothing, bag, shoes, rugs, pillows or photographs! None at all! It has never caught my attention. Things changed yesterday when I went to the scrapbook store. As I walked in, first thing I see, a zebra print paper. I don't know why, but I walked straight to the rack and grabbed one sheet. I didnt know what I was going to create but I knew it would turn out great!

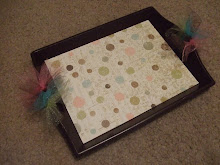
Today in the morning, I created this beautiful Wild Diva jewelry organizer. Its cute! I love it! Its also a picture frame. So what I am going to do, is create another jewelry organizer to match this one, plus a matching bigger earring holder. The one I have is just too small. Enjoy!

Have a great day!


Thursday, February 26, 2009

I love boxes!

I love boxes! I love small boxes, big boxes, weird boxes, decoupage boxes, pretty boxes you name it I love them! I am almost done with my craft room but I needed 2 boxes to store my clear stamps and glue. I went to the scrapbook store and saw some really cute pink boxes. When I looked at the price tag, wow! They were 19.99 each. Which is not bad cause they were really cute. I just couldn't afford $40 for 2 boxes at the moment! Plus my husband would have freaked out! :)
I immediately thought, "I could make the boxes myself". I stopped at Walmart and went straight to the aisle where they sell envelopes, tape etc... I found 2 small cardboard boxes that were .88 each! Now you know where I am going with this! I came straight home and started with my project! It was so easy, inexpensive and turned out so cute! I dare you to make one! :)

Cute Storage Box

Materials needed:

1 cardboard box
glue gun
scrapbook paper
embellishment
mod podge
spray paint
stamp pad

1. I used my glue gun to glue together the bottom part of my box. I used a little bit of tape first to hold together.
2. Glue all 4 flaps from the top of the box to the inside.


3. Spray paint your box. Light coats are better.


4. I cut a smaller piece of paper and decoupaged it to the front of the box. You will have wrinkles on your paper but this is good. You will see why!


5. The wrinkles came in handy! Using your stamp pad, rub against the paper and the sides of the box. You cant really tell in this picture but the left box is the one I distressed using the pad.


6. Be creative with the embellishment! I wanted a simple look with a flower, button and stickers! You can use ribbon, id plates, glitter, buttons etc...


Here you have it! My 2 beautiful inexpensive boxes! They look lovely in my craft room!
You can make them to decorate your living room, babys room, kitchen and even classroom!
If you ever make one, please let me know! I would love to see pictures!


Thursday, February 5, 2009

My new ribbon organizer

Remember I was going to use this as a ribbon organizer? Well not no more! I think I like it way better as a necklace holder. A lot of you left messages telling me it would be better as a jewelry holder, so thats what I am using it for. Guess what? I have found my new ribbon organizer!


Yesterday, my husband and I went to Albertson's to walk around I guess cause we didn't buy anything. On our way out, I saw this Christmas ornament box that were on sale for 4.99 (originally 22.99). I bought one to put my ornaments away, but once I was putting it together my husband told me "use it for your ribbons"! What a genius he is! I brought some of the ribbon I had and started organizing them and look.....


It worked out perfect! It is divided into 6 sections and holds all of my ribbon fine! I love it! I will go back today to buy one more (you cant pass the deal) because you can stack them. I can use them to organize other things! Im thinking of painting the organizer so it can match my craft room! Pink & Brown all the way! :) I love this color combination!

Wednesday, January 21, 2009

Dress up your corkboard

Little by little I have been organizing and decorating my craft room and its coming out really nice! I am looking for inexpensive ways to decorate my room. All my projects have been easily less than $5.

The other day my husband and I went to Savers in search of items to use in my craft room. My husband found this old and simple cork board and bought it for me. Its a good size cork board, but poor thing it needed a huge makeover!

So with a little help of fabric, ribbon, glue gun , i love you glue gun :) ..... and buttons, it went from this.......


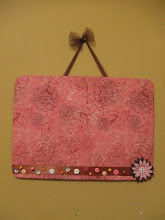
to this.......... What do you think? Pretty isn't it??


Here is a tutorial of how simple it is to make this project.

I bought this beautiful fabric at Hobby Lobby. I love scrolls if you can tell!


I measured the board and cut the fabric. Make sure you leave an extra 2 inches to staple the fabric.


Staple the fabric all the way around.


I looked for some buttons and flowers to dress up the cork board a little more.


I used buttons, and glass beads to make push pins. So easy... and so cute...


and wah-laaaahhh.. you have a beautiful, elegant flirty corkboard! The brown ribbon was a little extra to keep my push pins there. Its easier to see them and they dress up the board really cute! What do you think? Cute?? Go ahead, I dare you to make one! Its so simple! :)


Project Price:

Cork board $1.99
Fabric $3
Embellishment $1
Making your room pretty, PRICELESS


Much Love,

Monday, January 19, 2009

Inexpensive Organizing Ideas


I'm joining Thrifty Decor Chick Sarah's Organizing Party!

For the past few days, I have been working organizing and finish decorating my craft room. Its going well. I need to finish painting first before I do anything else. Half the room is painted beige, the other half is painted a light brown. :) It looks funny!

Anyways, here are some simple solutions to organize. Enjoy!


I organize my clothes by color and clothing item.

I bought these baskets for $1 each at Home Depot. They had a lot for sale, and guess what, I bought a lot. :) I wanted them for my classroom, but I don't have one of my own yet! But now that I am married and have my own house I used them everywhere to organize. I use them in my laundry room, in my pantry and my closet.


This is a plate rack. I bought it at the 99 cent store. I had a lot of trouble storing my pot lids, I found the perfect solution. Works like a charm!

I actually made this earring organizer. I glued the pieces of wood together. Then I painted and decoupage. After that, I added the screen and ribbon. It turned out to be a cute little organizer!

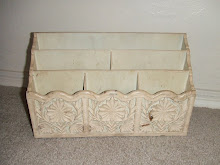
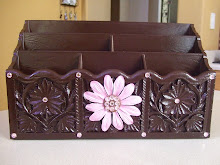
I bought this organizer at a yard sale for only $1. It didn't look like this when I bought it. I had to clean it, paint it and add embellishment. I keep it next to my computer. It holds paper.

I just finished making this ribbon organizer yesterday. Pictures coming soon of how I use it! :)

I bought these boxes at Ross. I think they were $3 each. Not bad. I usually put my glue sticks, staples for staple gun, buttons, erasers and many more things away in these. Its usually smaller things I need every day!

I bought this Rolodex file at a Thrift Store for $1.99
I dressed it up using scrapbook paper and stickers and it became my address organizer. So inexpensive, so cute so creative! :) Now I print the addresses on labels, and I just stick them where they belong!


This is my bill organizer. In on of the corners of the room I use it to pay bills, file mail etc... I made this bill organizer using clothespins, paper and stickers. I have numbers 1-31, one for each day of the month. If I have a bill I have to pay on the 15th of that month, I usually clip it under 15 clothespin. I have a baby shower on the 25th, so as you can see, I have the invitation clipped on the clothespin 25. Just a little extra I added! :) I also keep my envelopes on the wall. In the same box they came in, I dressed up the box using paper and stickers, and Wah-Lahhhh..

I bought this children's toy organizer at a yard sale for $5. I originally wanted the organizer for my classroom, but since I am still working as a substitute I use it in my house. I have a new project for this organizer. I don't like the colors too much. I would love for them to match my room colors. So plastic boxes, get ready for some spray painting! :) I will post pictures once I am done!


This is how I organize my acrylic paints. I bought this organizer at Michael's for $15. Its worked for me so far.

This is how I store my scrapbook paper. I bought this paper organizer at the Thrift Store for $1. I organize the paper by color. It works.

I use this box to store smaller items. I keep it in my closet.

I bought this plastic organizer at a yard sale. Bought it for only $2. I usually have my computer paper, cardstock and magazines in this organizer.

So, what do you think? Hope you liked this post. Please leave your comments! :)