Wednesday, July 14, 2010

Vintage/Modern photo canvas project.. So cute!!

It feels so good to create projects again!
I am oficially in my second trimester and happy! Let me just tell you the first three months....WOW... I was seriously in bed all day; tired, sleepy, cramps, sick... whew... glad Im over that! I did not have strength to create anything! I really didn't feel like doing anything but sleep! If you've been pregnant, did you ever feel like this? or did it just happen to me?
So im 4 months and 2 days! :) but whos counting really.. ha...ha.. So weird, my belly popped out exactly at 4 months. One day, I just woke up and saw my belly! I love this new experience that Im going through and cant wait to meet my baby.
Anyways, I wanted to share this super cute canvas project I finished today. It does take a while to complete but worth it! I love the vintage/modern look of it.
I made this project using an 8 X 10 canvas and a picture of my niece I took of her on Easter. I made it using a cool transfer technique using mod podge. I absolutely love how it turned out. I must say, its a little messy but the results are wonderful.
I used a wash-out technique to give it an antique look which I love. To give it a modern look I used some swirl designs, pink crystals and tulle bow!
I really love they way it turned out so I might be making a few more.
Enjoy the pictures of my project!
Also, visit my shop and check out new items Ive listed!


Thursday, July 1, 2010

Day of Blog Silence for Baby Cohen

Thinking of Megan and Brent who are holding the memorial service for their baby boy Cohen today.

Tuesday, May 4, 2010

Cute Mother's Day Gift Idea

I made these cute birth announcement photo blocks for my sister. This will be her Mother's Day gift from her daughter, Yuliana. (21 months old) I think they turned out so cute!
This project is made using 2 X 4's bought at Home Depot.
I am now working on a blue and brown set from her son, Johan. (4 months old) I will post pictures soon!
I have an announcement to make..... drumroll pleaseeeee.....
I AM PREGNANT! I thought I shared the good news! I am 6 weeks and couldn't be happier! I cant wait to meet our baby and make a lot of cute stuff.
Have a great day!
Visit my shop:


Thursday, April 15, 2010

Bright and Fun Teacher Gift

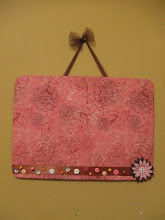
This is a custom order I did for a lady who is student teaching and wanted a cute bright sign for her mentor teacher. She said bright and really it doesnt get brigther than this! ha.. I think it turned out so cute! I used swarovski crystals on the flower rosettes and a touch of tulle!


I have them on sale for $25 plus shipping if anyone is interested. (Until April 18th, 2010) I can make them any colors! Visit my shop and check out other teacher gifts I've made.


Here is a different style I have done for a teacher.

Monday, April 5, 2010

Charger Transformation - For the love of turquoise!

Good morning! Hope you had a great Easter Sunday! We sure did!
As you know, I'm in the process of adding more turquoise into my living room. I am challenging my self to decorate with things I all ready have. Today I share with you an easy project that makes a big change.
The power of spray paint is great! I love spray paint.
I've had this beautiful charger for over a year now. I bought it at Kirklands, one of my favorite stores. Its got to the point where its a little boring now. It needed a makeover! So it got one today!
First, I cleaned it well with a damp cloth.
Then, I spray painted a turquoise color. Spray light coats to get a better result.


Next, I watered down brown paint and used it as a glaze.
Wipe down paint after 10 seconds or so. Its a quick process.
After it dried, I used normal acrylic paint to bring out the 3-D embellishment.

This is the final result! I love it! Looks like a new charger! Its always a great idea to use things that you all ready have and give them new life! This project was free since I all ready had all the materials! Its looking great in my living room!
Thanks for visiting! Hope you enjoyed this easy tutorial!


Thursday, April 1, 2010

Super easy and cute flower headbands

I am in love with all the girly girl hair accesories! Love them! Especially flowers!
I started making these flower headbands for my niece and guess what? I fell in love with them and kept them! ha... Dont worry, I will be making more for her! This is a super easy project that anyone can do.
Materials needed:
Glue gun
Flower
Braided elastic
Tulle (optional)
Scissors
Felt

1. Separate your flower.

2. Cut 2 circles out of felt. (1 1/2in. diameter) Size of circle depends on size of flower.
Glue the first layer of flower on top of the felt circle.

3. Continue gluing the flower pieces together.
4. When finished gluing the flower, I added glue to the center of flower and used beads to decorate. You can also use swarovski crystals, ribbon, buttons etc...
5. I added hot pink and black tulle to the bottom of the flower.

6. Cut a piece of elastic (around 18 - 20 inches) I dont like it to tight thats why I cut the elastic a little longer.
7. Glue the ends of the elastic together. Using the 2nd piece of felt glue the elastic and the flower on top.
This is how the final project turned out!
I am loving the messy hair style! It looks so cute with the flowers! I'll be styling one of these tomorrow!
Hope you have enjoyed this easy tutorial! If you make any, I would love to see pictures!

Tuesday, March 30, 2010

Citrus Pork Chops

I want to share a quick recipe with you today.
They are delicious! They have a zesty orange taste! So good..
Citrus Chops
1. Heat 1/2 t. oil in large nonstick skillet over medium-high heat.
2. Add 4 pork chops (3/4 inch thick) and brown on each side.
3. Reduce heat to low; add 1/4 c. sliced green onions; 1 T. orange peel, 1/2 c. orange juice and 1/4 t. dried basil.
4. Cover and simmer for 7-8 min.
5. Serve immediately


Personalized Teacher Gift - So cute

I am loving the things I could do using 2 X 4's!
I did this cute personalized teacher block set for a student teacher. I think it turned out really cute! Love the colors!
1. I first cut my 2 pieces of wood.
Name block measures: 12 inches
Top block measures: 6 inches
2. Using the palm sander, I made sure to sand both pieces until nice and smooth.
3. I painted both pieces of wood using a turquoise color.
4. I used my cricut to cut the letters.
5. I decoupage the letters using Mod Podge.
6. After the blocks dried completely, I embellished with tulle and a pretty rose.
7. Final step was to add black dots around.
So cute! I added these blocks in my shop if interested! :)


Sunday, March 21, 2010

"Nest" Turquoise Distressed Blocks w/ Photo Block


I've taken a LONG break. But I'm back!
I want to share a really cute project I did yesterday! I dont know about you, but I am loving the color turquoise! Its so fresh, clean and beautiful! Im working on a few projects in my living room; one of them is adding more turquoise. Plus, I love the color combination of turquoise and brown! Perfect!
I started out with a 2 X 4 I bought at Home Depot. I have all the measurements down since I sell them in my etsy shop.
I sand all the blocks really good until smooth. I choose a beautiful turquoise color to paint all the blocks.
I used my cricut to cut all the letters. I love my cricut!


I used a chocolate brown paint to distress. You will need to water it down so it could be easier to wipe off.
Using a brush, paint one block at a time. After a couple seconds or so, wipe down with tissue or napkin. It will give it a nice distressed look.
You could see the difference in this picture.

When all the blocks are dry, adhere letters using Mod Podge. You finish by adding a cute birds nest on top the letter N and distressing the edges.
Now isn't this cute? I love it and it will look great in my living room.
Hope you have enjoyed this quick and easy tutorial!
More projects coming soon!


Tuesday, December 1, 2009

Christmas "JOY" Wooden Blocks - Christmas Card Holders


Here is an super easy Christmas decoration you can make this year!

I made these to display in my living room, and each block will hold a Christmas card this year. I made different blocks to display pictures and Christmas cards around my home. They look really cute!

Check them out at my shop:

So Lovely Creations

www.slcshop.etsy.com

Materials needed:

2 X 4 piece of lumber (bought at Home Depot)
Acrylic paint
Scrapbook Paper
Wooden Dowel
Small clothespin
Tulle
Wood glue
Mod Podge

Steps:

1. Cut 3 - 5 1/2in pieces of wood.
2. Using sand paper, sand each piece until they are smooth.
3. Paint the sides and back of each piece of wood. Let dry. Give a second coat. Let dry. Sometimes you might need to give a 3rd coat ;)
4. Cut scrapbook paper to size. I cut them just a little smaller to fit in the front of the block.
5. Decoupage with the paper.
6. I use my cricut to cut the letters, but you can also trace and cut letters by hand.
7. Decoupage letter.
8. When everything is dry, I drill a hole at the top middle part of my block.
9. I put a little bit of wood glue in the drilled hole and place a 4in dowel in the hole.
10. Let dry for a couple of minutes. (10 min)
11. Glue the clothespin at the top of the dowel.
12. Place block with the back on the floor so clothespin wont move. Let dry (10 - 20 min)
13. Once dry and set, paint the dowel and clothespin.
14. Last step is to add the tulle and enjoy!

Personalized Wooden Blocks

I have been so busy with work and making these cute blocks! I had several custom orders and they are turning out really cute! I'm making different themed blocks. They are great to give as gifts for Christmas, birthday's or even to decorate kids rooms! If you would like to order a custom set, please visit my shop:

So Lovely Creations
www.slcshop.etsy.com


Align Center

Sunday, November 15, 2009

Personalized Wooden Blocks - Great for Christmas gifts!

Michaels.com is having a handmade holiday contest! You have to create a creative gift under $20.
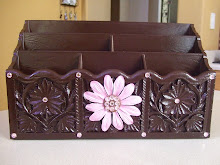
I submitted my elegant desk organizer!

Please vote for me!

Michaels Photo Entry - Elegant Monogram Desk Organizer


Is anyone else participating in this contest? If you are, please let me know! I would love to see your projects! :)


These are some of the cute blocks I've been making to give as gifts this Christmas!
Aren't they cute? I loved how they turned out.

You can also visit my shop if you would like to purchase.


So Lovely Creations

They are really easy to make.
They are made out of wood.

I hand cut each piece of wood.
Then I sand the wood make it all nice and smooth.
Prime.
Paint. Let it dry. 2nd coat of paint. Maybe even a third. Thin coats.
Using Mod Podge, glue pretty coordinating scrapbook paper or use the same for all blocks.
Drill hole on top.
Glue dowel and clothespin.
Let the glue dry completely otherwise you will have broken dowels.
Add tulle. Embellish.
Paint wooden vase and glue.
Cut out matching paper photo mats.
Ta-da! you are done! :)

You will have one of a kind personalized wooden blocks.
I made these for my friends who are getting married soon. Lua is their last name. I am also making some matching frames.

These Natalie and Karen blocks I made them for my nieces. I have not finished them completely. I will add dowels for photos and a lot of tulle! :) Maybe even some glitter.


Brown and Pink Damask with white


These "Johan" blocks are for my nephew who will be born in Dec. I am so excited! I am thinking of using them for the baby shower and having the ultrasound pictures for each block. Wouldn't that be cute!


I made these cute antique crackle set for my friends newborn daughter. I loved how these turned out. It will go in her room perfectly!


This "K" block I made for a friend of mine who I use to work with. She is a great person! This was her little birthday gift I made her!

Well, I hope you are getting tons of ideas for gift giving this Christmas! Go handmade! :)